
Below, Join Kenia, Account Manager, and Sandra, Client Support Specialist, as they showcase the new Projects enhancements.
Projects are useful in many different ways - from kitting your products to adding additional paperwork or simply gathering some new photos of your products, Projects are used when the normal pick and pack solution doesn’t fit your needs. If you’re looking for more attention to detail for a big shipment to a retailer, our amazing Project teams can get it done.
 When to Create a Project
Here’s a few situations where a project should be created:
- There are more than 100 items (in Chicago or LV) or 50 items (in Toronto) in the order
- There are specific instructions to be followed that go outside the normal circumstances (ex. please unbox SKU A to create SKU B and ship out, please dispose of SKU A)
- An action is required for product that cannot be completed via normal processes (please take photos of SKU A, please check expiry dates)
- Total shipment quantity exceeds a full case quantity
- There is a need to kit and assemble units and/or break down full cases to single units
Under the Projects section from the main menu, you’ll be brought to the main projects page. If you’ve created projects before, they will be listed already and can be filtered from the right-hand side by warehouse location or status. On the left, you can search by specific information to locate a project:
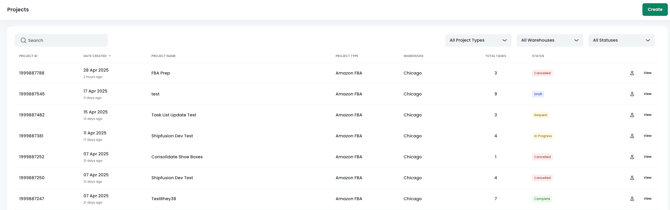
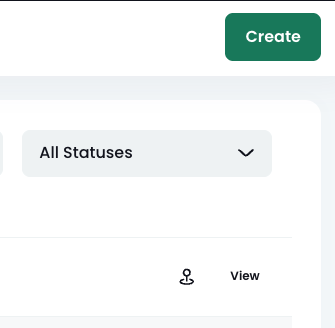
To create a project, choose the Create button in the top right:
Submitting a Project
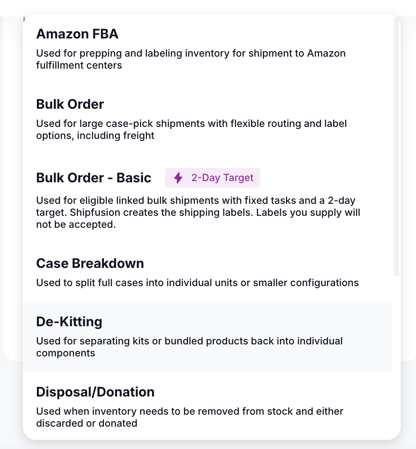
After you select Create, complete the steps below before the project can be submitted. A short description appears for the project type you select.
1. Choose a project type
- Kitting: Used for combining multiple components into a single finished product before fulfillment.
- De-Kitting: Used for separating kits or bundled products back into individual components.
- SKU Conversion: Used when relabeling or reassigning inventory from one SKU to another.
- Amazon FBA: Used for prepping and labeling inventory for shipment to Amazon fulfillment centers.
- Transfer: Used to move inventory from one Shipfusion warehouse to another.
- Disposal / Donation: Used when inventory needs to be removed from stock and either discarded or donated.
- Case Breakdown: Used to split full cases into individual units or smaller configurations.
- Bulk Order: Used for large case, pallet, unit, parcel, or freight shipments that need flexible routing, label, quote, or custom task options.
- Bulk Order - Basic: Used for eligible bulk shipments with fixed tasks, Shipfusion-provided labels, and a 2-day target.
- Other: Used when the project does not fit a standard type and requires review by Support.
Use Bulk Order when you need a quote, client-provided labels, a custom task, or a carrier outside the approved list. Use Bulk Order - Basic for an eligible bulk shipment that can follow the fixed task list.
2. Link the shipment
Link a shipment when the project ships product or kits SKUs, for example SKU A + B = SKU C. When a shipment is not required up front, you can add it before you submit. Bulk Order - Basic requires the linked shipment before you can continue.
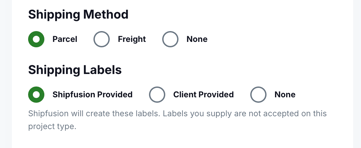
3. Choose the Shipping Method and Shipping Label source
Every project uses a shipping method and, when the project is being shipped as parcel, a shipping label source.
Shipping method
- Parcel: the project ships by parcel carrier.
- Freight: the project ships by freight.
- None: the project is not being shipped. Use this for work such as a SKU conversion.
Shipping labels
Shipping labels appear when Parcel is selected.
- Shipfusion provided: Shipfusion creates the shipping labels for the project.
- Client provided: user uploads the shipping labels to use on the project.
If you select Freight, the shipping labels field is removed. A label source is not required for freight.
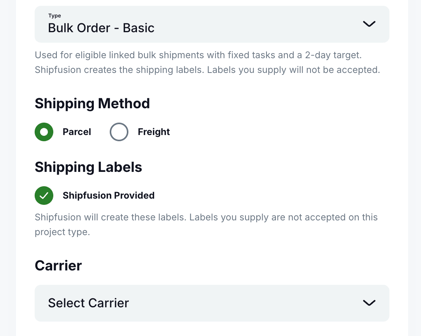
Bulk Order - Basic also asks you to select a carrier. On that type, shipping labels stay on Shipfusion provided. Shipfusion creates the labels, and labels you supply are not accepted. Parcel uses the approved FedEx services.
Set the requested completion date. The form shows a general 3-business-day estimate. Support may adjust that date after review. It is not a guaranteed completion date.
Bulk Order - Basic fills in a 2-business-day target. Before the 8:00 AM cutoff on a business day, that day is Day 1. At or after the cutoff, or on a weekend, holiday, or closure, the next business day is Day 1.
Check the acknowledgement under the requested completion date before you continue. It updates when you change the project type. Bulk Order - Basic uses its own acknowledgement for the fixed task list, billing if the project is cancelled after work has started, inventory or component availability, and that the faster timeline is not guaranteed.
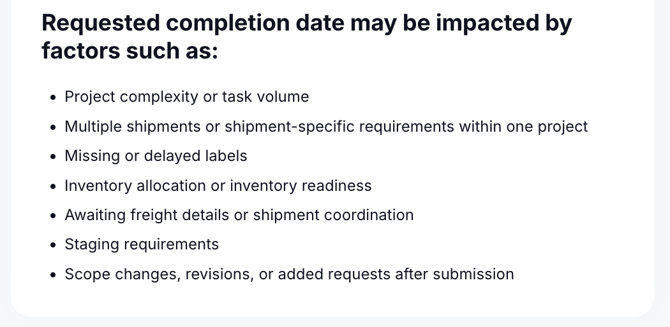
Requested completion date may be impacted by factors such as:
- project complexity or task volume
- multiple shipments or shipment-specific requirements within one project
- missing or delayed labels
- inventory allocation or inventory readiness
- awaiting freight details or shipment coordination
- staging requirements
- scope changes, revisions, or added requests after submission
Checkbox: I acknowledge delays caused by missing information, submission changes, or additional requirements may extend project timelines and could result in additional charges.
5. Confirm the tasks
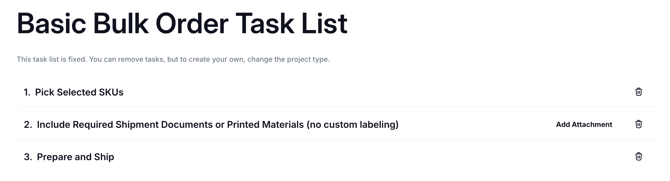
Add the tasks from a saved task list or a new list. You can reorder tasks and attach the files a task asks for. Bulk Order - Basic uses a fixed list. You can remove, reorder, and restore those tasks. A custom task cannot be added.
Saved task lists and new lists are covered in Accessing Task Lists and Using Task Lists With A Project.
6. Submit
Review the project, select Submit, and confirm. Support reviews the project. It moves from Submitted to Approved, then In Queue, and to In Progress when work begins.
A qualified Bulk Order - Basic project moves to In Queue after submission.
The create form collects the project type, linked shipment, shipping method, requested completion date, and acknowledgement described in Submitting a Project. After you create the project, you land on the project overview.
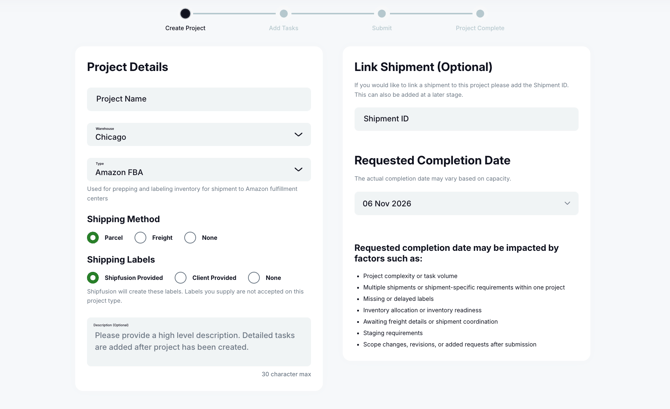
Link the shipment during submission when the project ships product or kits SKUs, for example SKU A + B = SKU C. When a shipment is not required up front, you can link it before you submit. Bulk Order - Basic requires the shipment before you can continue.
The requested completion date is set during submission. The form shows a general estimate that Support may adjust after review. Bulk Order - Basic uses a 2-business-day target.
If you need a specific date or a project is urgent, please reach out to the Support team for assistance. Our team will do our best to accommodate your requests.
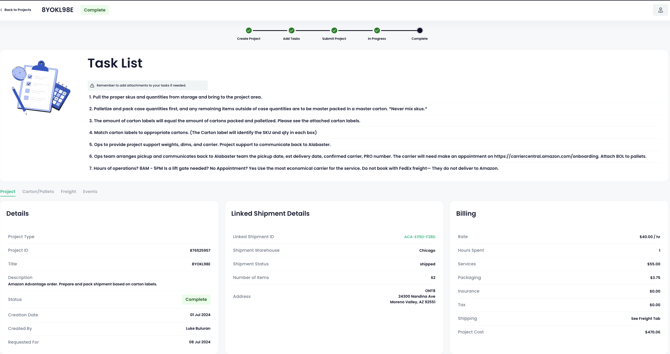
Once you have selected the Create button, you will be taken to an overview of your project:
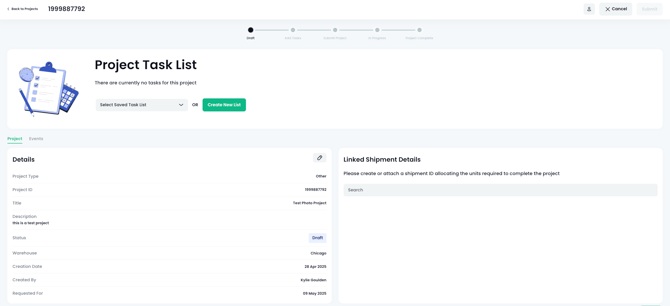
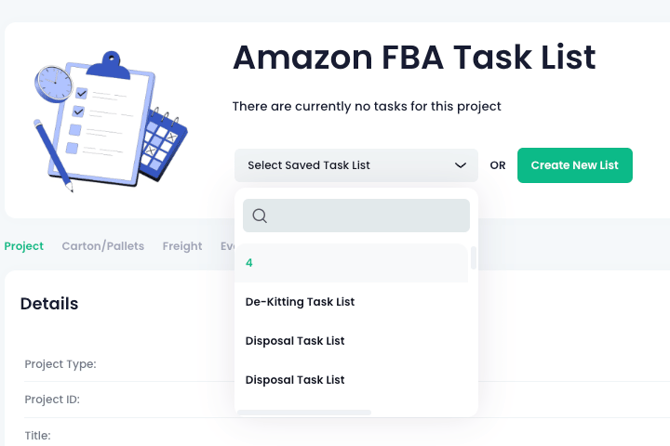
From here, you will need to add a Task List to your project. Task Lists are templates you can set up for common projects you submit, decreasing the amount of time it takes to create a project. If you already have these set up, select one from the drop-down. If this is a project that does not have a suitable task list already created, select Create New List. More on task lists can be found in a later section.
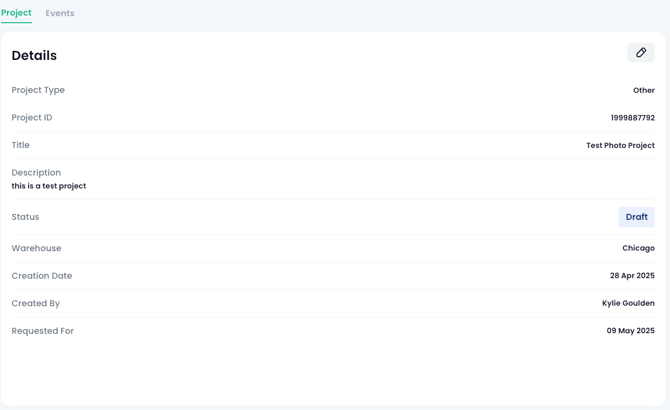
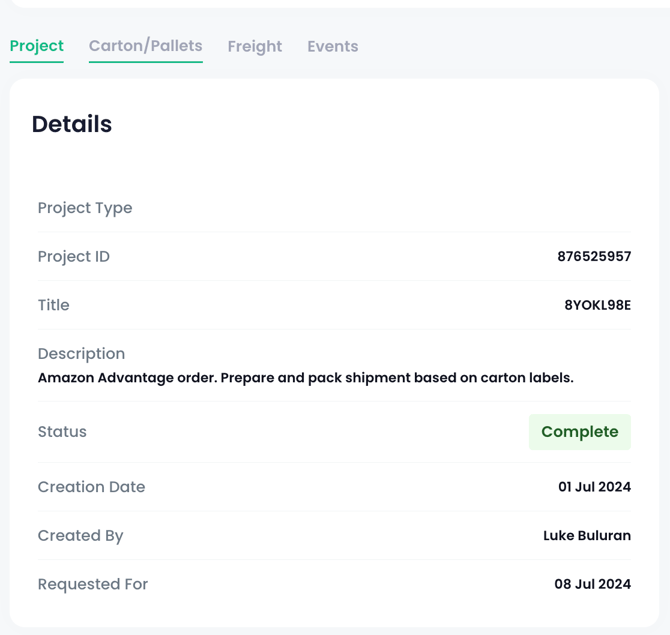
You can see all of the general details of the project under the Details tab, such as the status, shipment ID, warehouse location, and creation date:
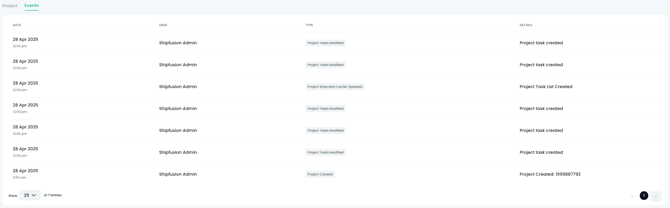
The Events tab will show any changes made to the project, the date, and by who:
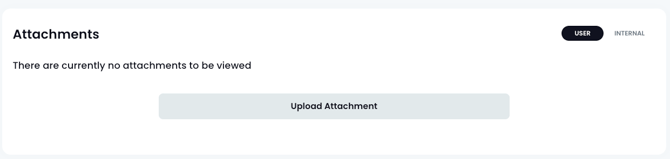
You can add any Attachments needed for your project under the Attachments section. Note the User and Internal toggles in the top right - selecting a specific option will ensure your attachment is only visible to that specific group:
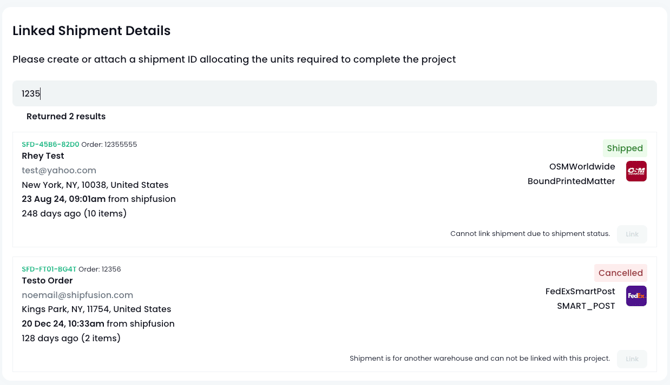
If you have a linked shipment attached to your project, you will see the details in the section on the right. If you created the project originally without a shipment and wish to add one at this step, you can paste in the shipment ID to link it:
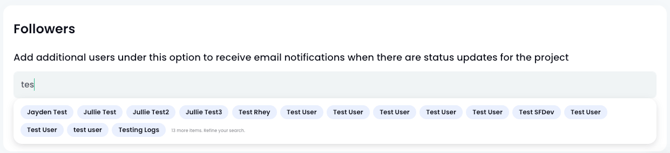
You can add Followers to stay updated on your project under the Followers tab. Just start typing their name and select the person’s name in question:
If you would like to mark your project as a favourite and have it pinned on your dashboard, you can select the Pin option in the top right.
Once you have reviewed your task list and all information looks correct, select the Submit button in the top right, and then confirm your submission. This will submit the project to the Support team, who will review your project for any issues. If any clarification is needed or more information is required, they will reach out to you.
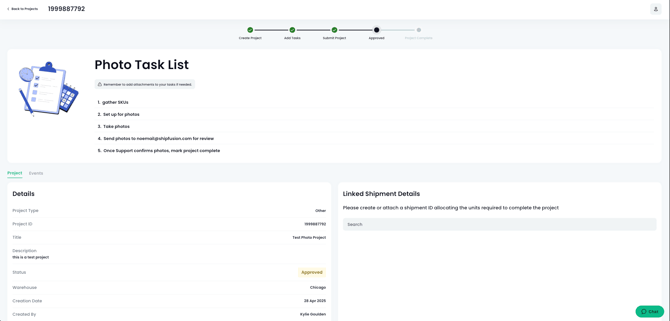
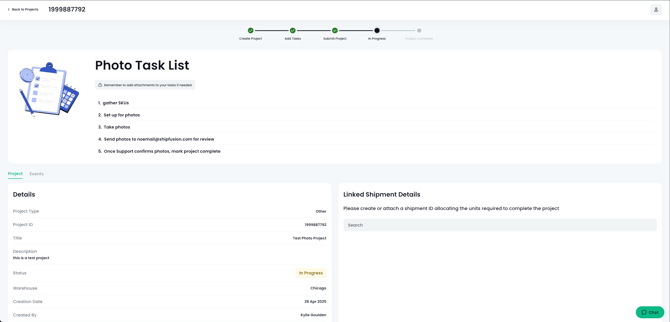
After you submit, the project moves to Submitted. Support reviews it, and it then moves to Approved, In Queue, and In Progress once the Projects team begins work. A qualified Bulk Order - Basic project moves to In Queue after submission.
A downloadable FAQ document is available here.
Accessing Task Lists
To access Project Task Lists, select Projects from the main menu. You will then see the option to choose Tasks Lists under it:

Once selected, you will be brought to the Task Lists Overview page, which will list any already created task lists, active and inactive:
- Active makes the list visible at the time of project creation
- Inactive makes the list hidden during project creation
- When a task list is made Inactive, it will also be removed from any existing projects that are in Draft status.
- Projects that are Submitted or already In Progress will not be impacted
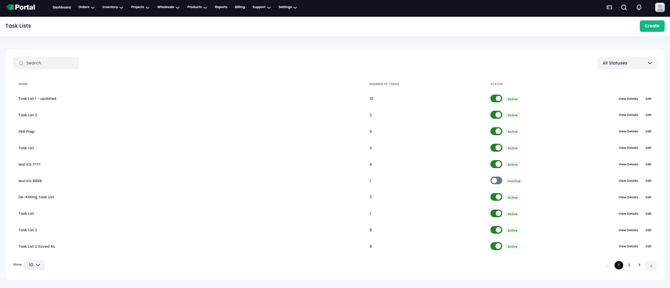
From here, you can see the details of each task list, such as the name, number of tasks, and current status. To view details at a quick glance, select the View Details button next to the corresponding list:
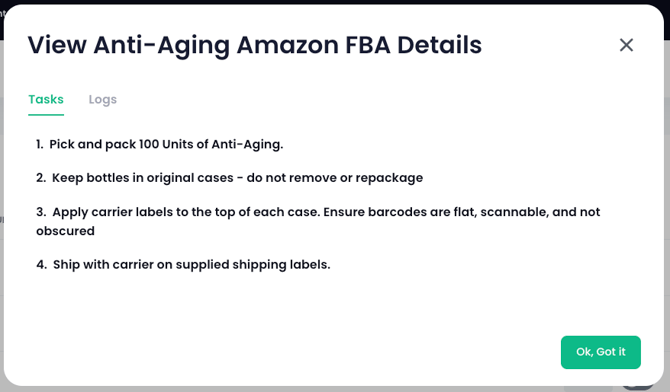
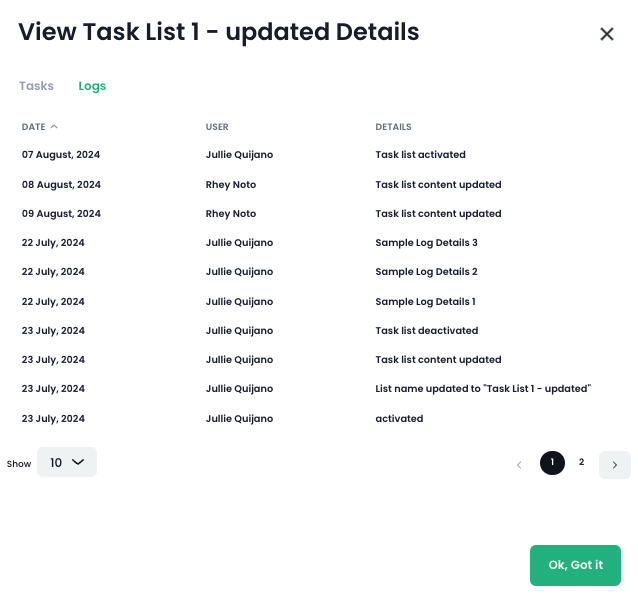
From the modal, you can see a quick overview of the tasks associated with the list. Under the Logs tab, you can see any changes that have been made to the task list so far:
Selecting the Edit option will bring you to a page that allows you to create your task list:
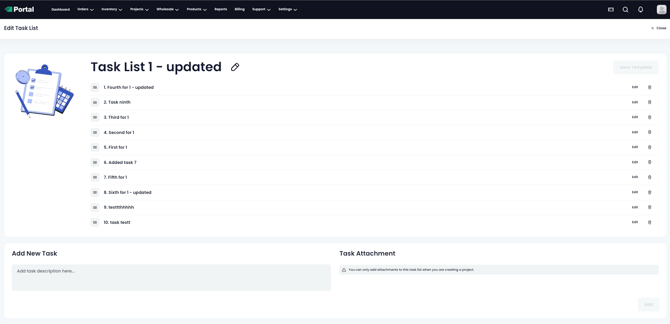
From this page, you can edit the title of your task list via the Edit icon near the generic title. Note that this title must be unique from any others you have created.
To add a task, type in the Add New Task field. The Add button in the bottom right will then become active. Select it to add the task to the list:

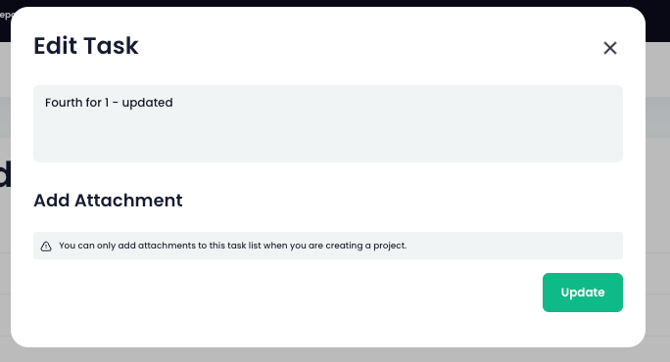
You must add attachments to your tasks while creating a project, as indicated in the instructions.
To reorganize your tasks, select and hold the button on the left side of a task, then drag it up or down:
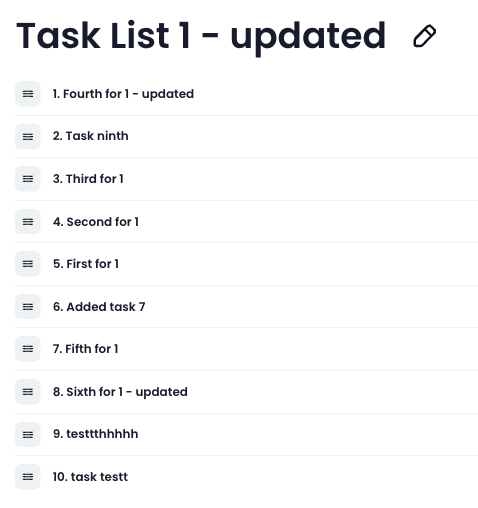
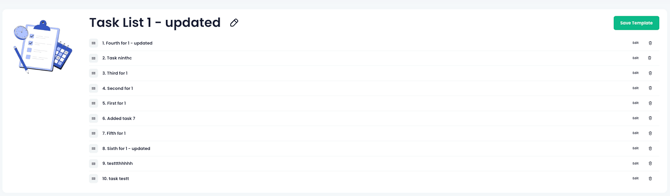
To remove a task, select the Trash icon. This will delete the task and display a Save Template button. You must select this button to save your changes:
Finally, to edit an already created task, select Edit next to the task to open the editing modal:
Using Task Lists With A Project
To use a task list with a project, navigate to the Projects > Manage Projects page. Select the Create button in the top right corner:
On the next page, select the project type from the Project Details section, add your linked shipment (if applicable), and set your requested completion date. Then, select the Create button in the bottom right corner:
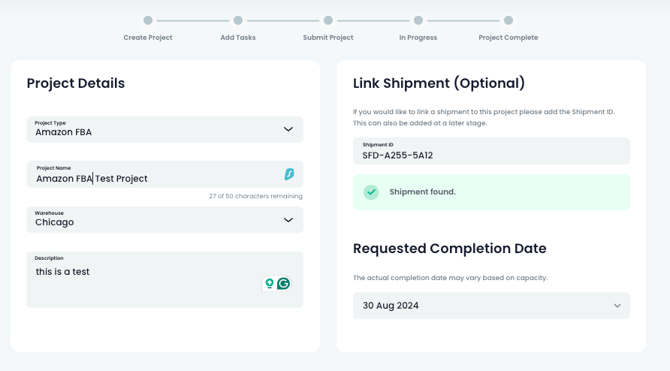
The project types and the descriptions shown with them are listed in Submitting a Project.
This will allow for organization as well as efficient queuing processes for operations.
Once the project is created, you will see a notification at the top indicating that the task list has not been set. To assign a task list, choose an existing list from the drop-down menu or select the Create New List button to create a new one:
Choose a saved task list or create a new one. Bulk Order - Basic uses a fixed list, and a custom task cannot be added.
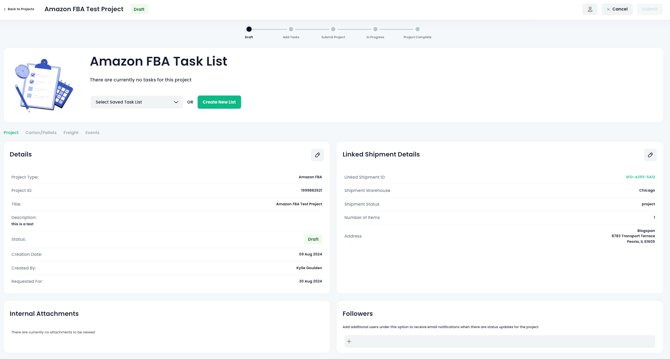
There is now additional guidance during the submission process - Now, you have a stepper to guide you through the mandatory steps before a project can be submitted.
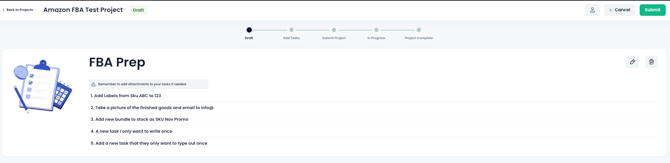
If you select a pre-existing task list, the tasks will appear. To modify the tasks, select the Edit button on the right. This will take you to the Manage Task Lists section, where you can edit the task template. To remove the task list from your project, simply select the Trash icon.
For Saved Task List Selections, you will need to select the Edit button and then edit the specific task to provide attachments:

If all your project details are correct, select the Submit button in the top right corner to submit your project for review by our Support team:
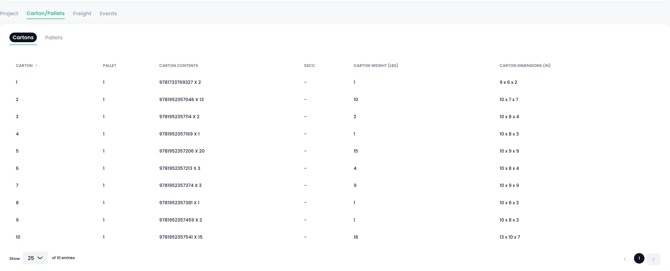
 The Carton/Pallets Tab
The Carton/Pallets tab will provide an overview of each carton and pallet related to your project. This information must be provided by our Operations/Support team before this appears:
 Accessing Freight Within A Project
If you have a project that is linked with Freight, you will also see a Freight tab option:
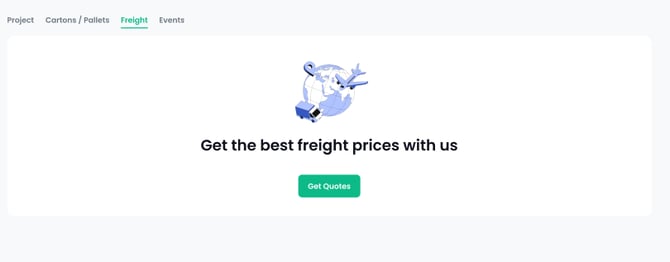
There are 2 possibilities/views for the Freight Tab before booking:
Bulk Order - Basic does not request a freight quote. Use Bulk Order when the shipment needs a quote.
- If Freight is enabled, you will see a Get Quotes:
-
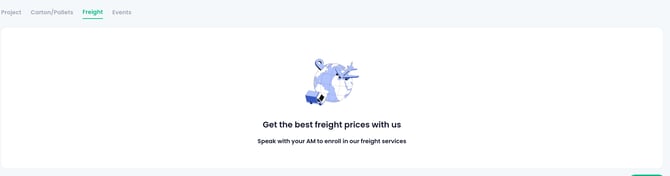
If Freight is not enabled, you will see a message to reach out to your account manager to get enrolled:
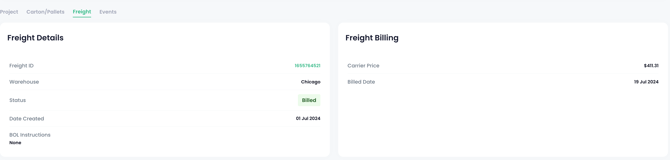
Selecting the Freight tab will provide you with the Freight Details and Freight Billing sections.
The Freight Details section provides you with the freight ID, origin warehouse, current Shipfusion status, the date the request was created, and any BOL instructions.
The Freight Billing section provides you with the carrier price and billing date:
 Questions
- How long does it take a project to be completed?
This depends on the scope of the project, the volume of items, the complexity, and how busy the team is with other projects. The form shows a general 3-business-day estimate, and Support may adjust it after review. Many projects are completed in about 3-5 business days after approval. Bulk Order - Basic targets 2 business days, and that date can move if inventory or required components are not ready.
- Can I expedite my project?
We make every effort to accommodate! please reach out to the Support team with dates and timelines.
- Can you provide the signed BOL for my shipment?
Once the shipment has been picked up and signed for, a team member will attach a signed copy of your BOL to your project. Please note this is also available under the attachments section of the projects corresponding shipment ID.
- When should I use Bulk Order - Basic?
Use Bulk Order - Basic for an eligible bulk shipment that can follow the fixed task list, with Shipfusion-provided labels and a linked shipment. It targets 2 business days. Use Bulk Order when you need a quote, your own labels, a custom task, or a carrier outside the approved FedEx services.
- Why do I have to acknowledge the completion date?
The date you request is a planning date. It can move if information, inventory, labels, or shipment details are not ready, and checking the box confirms you have read that. Bulk Order - Basic has its own acknowledgement because that type uses a fixed task list and a faster target.
- I have a question/concern about a project, who do I contact?
You can create a Support ticket or a project, or you can email projects@shipfusion.com. Please make sure to provide your project ID/shipment ID and any other further information that will help the Support team assist you (ex. SKU names, quantities)